Dueling Pistols used in John Wick 4

As a huge fan of this movie franchise, I was over the moon to have the opportunity to design and engrave my artwork to be used in the fourth installment of the series. When I accepted this job, my schedule was already completely booked, perhaps overbooked, but after careful evaluation, I couldn’t say no, even though I knew it meant extremely demanding hours behind the pencil, drawing the designs, going back and forth on revisions with everyone involved, and also the shop hours in metal preparation, design transfers and ultimately, hand engraving.

In addition to the artwork and engraving normally in my wheelhouse, came the inevitable unexpected hiccups in a big custom project, finding parts, making parts, team collaborations between multiple wonderful artisans working with each other from different sides of the country and the shipping issues that come along with that. Project management! We all pulled a lot of weight and accomplished what, for high craftsmanship is a rare and remarkable feat to create a dueling set like this in the time frame required, without sacrificing integrity in the art and craftsmanship. This set is not built like a movie prop, but like a rare and exquisite work of art encompassing what I estimate to be over a thousand work hours between the members of the team.

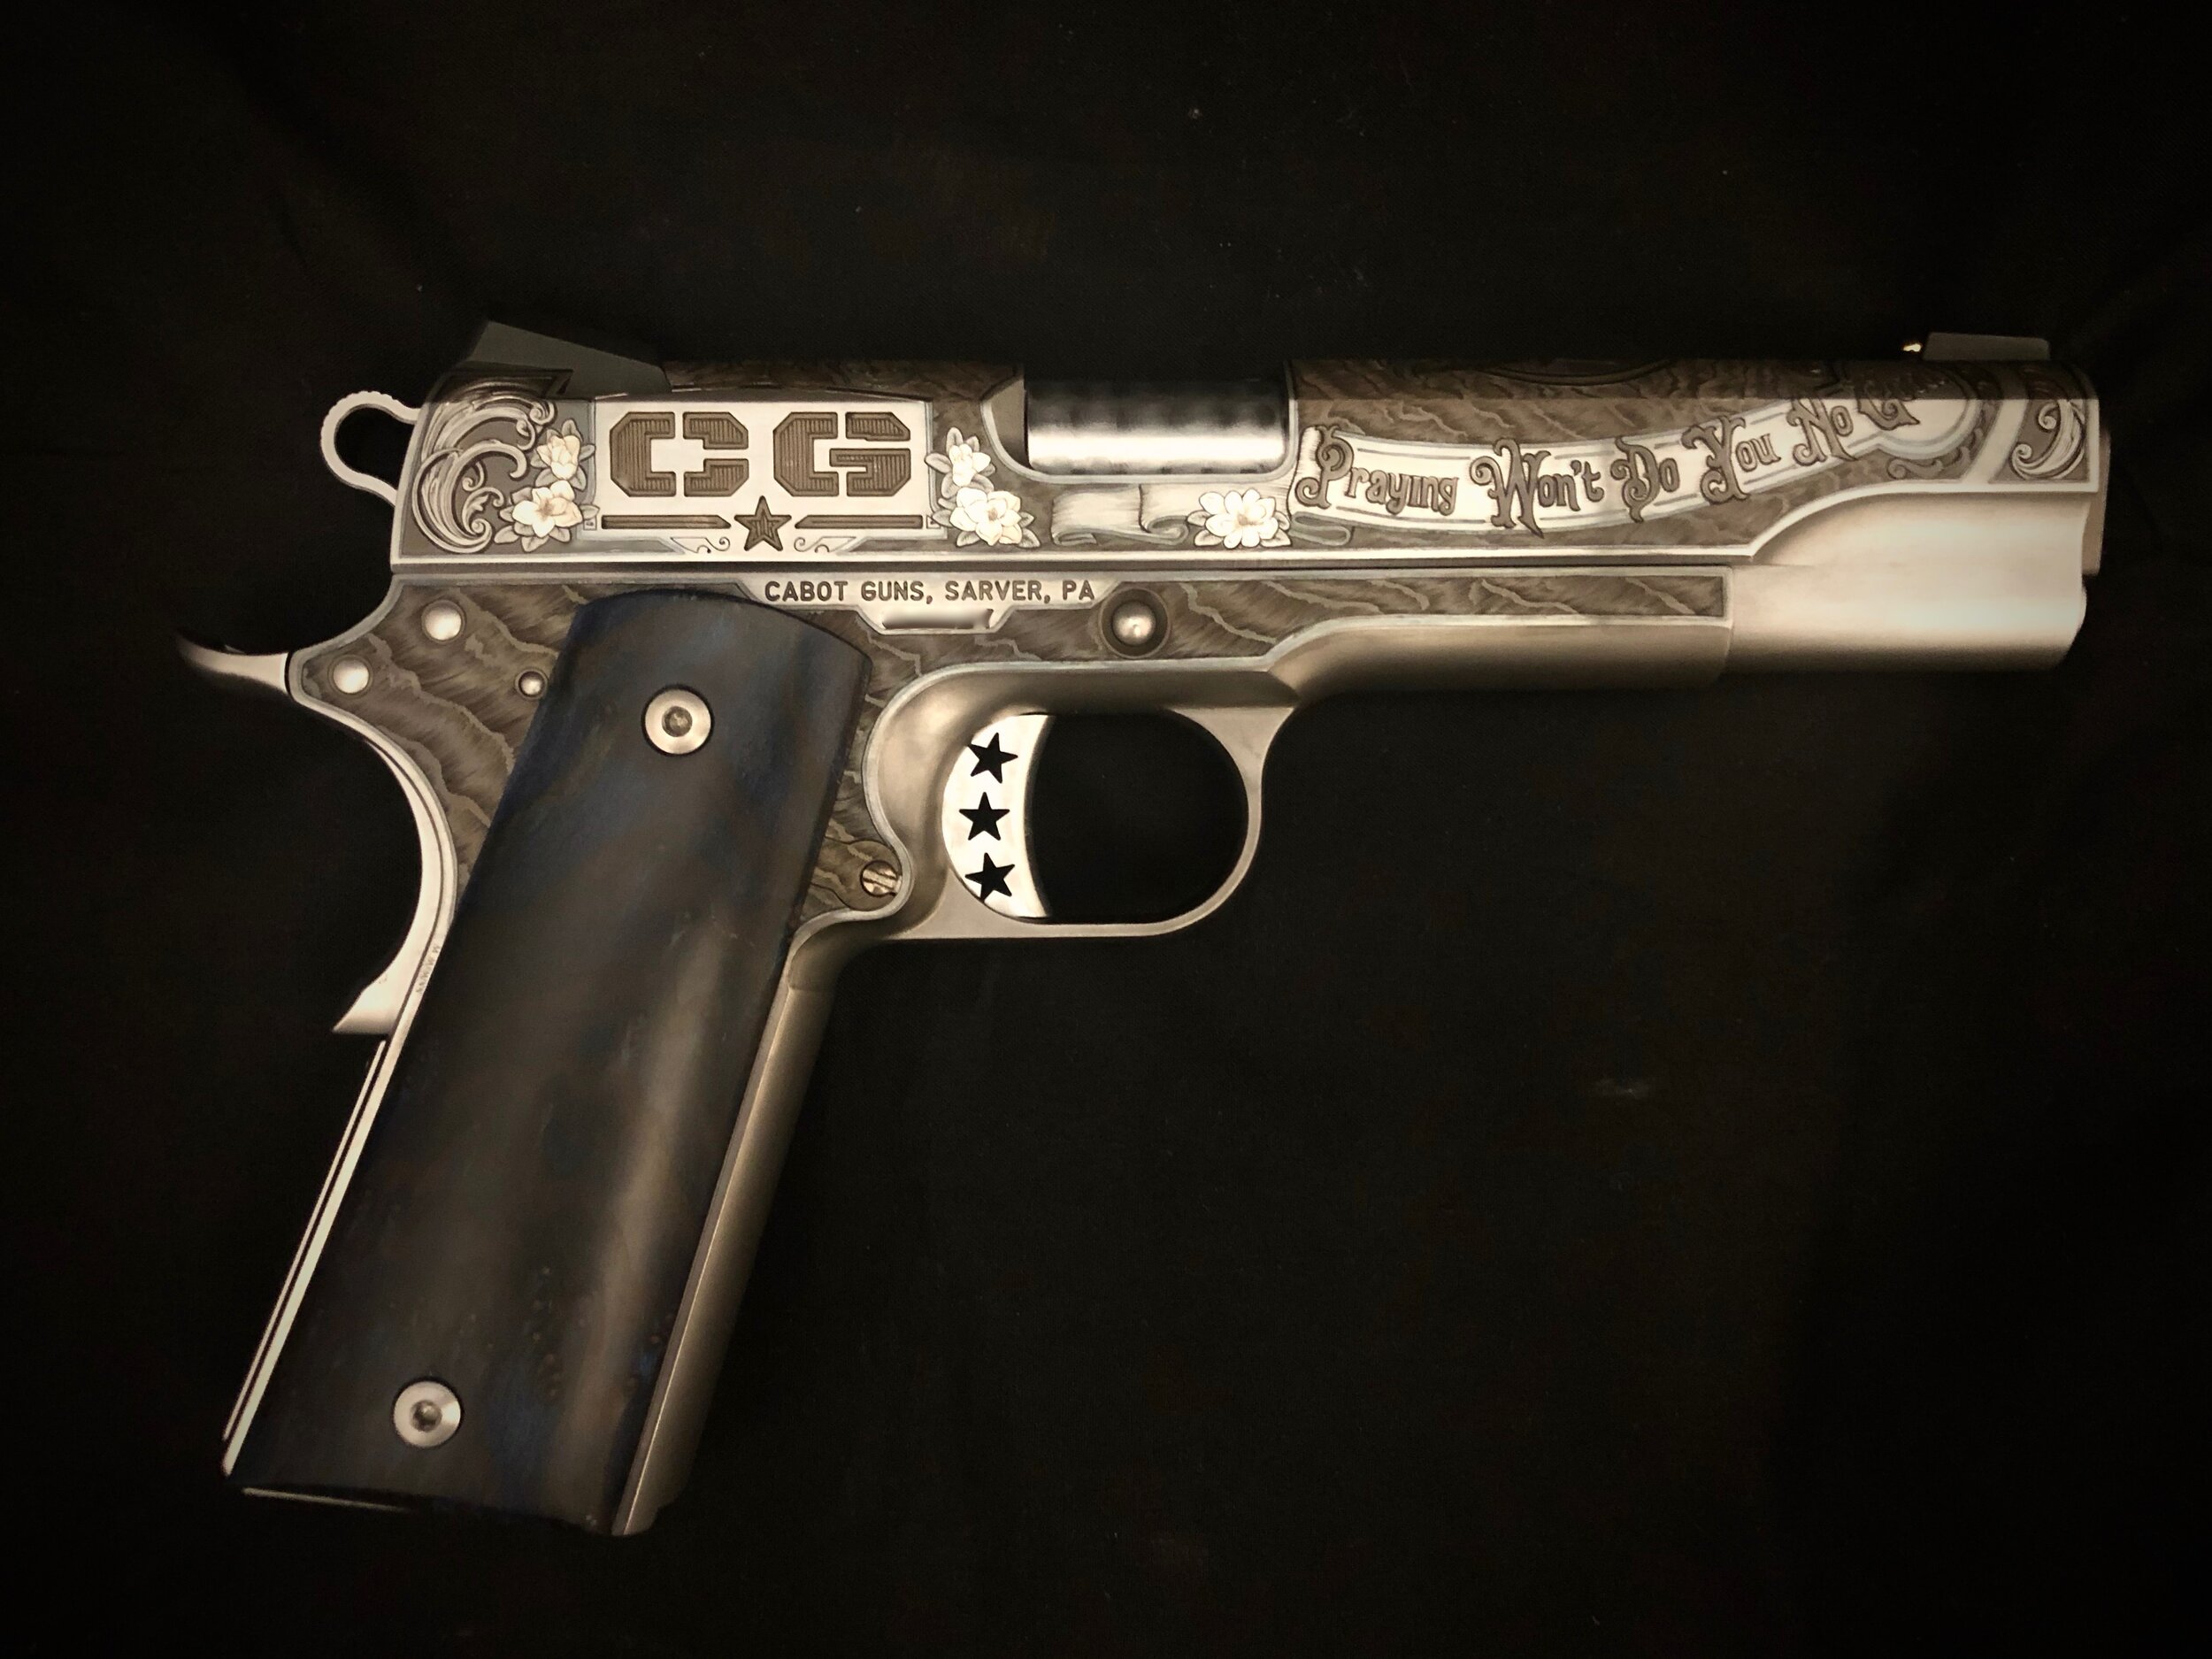
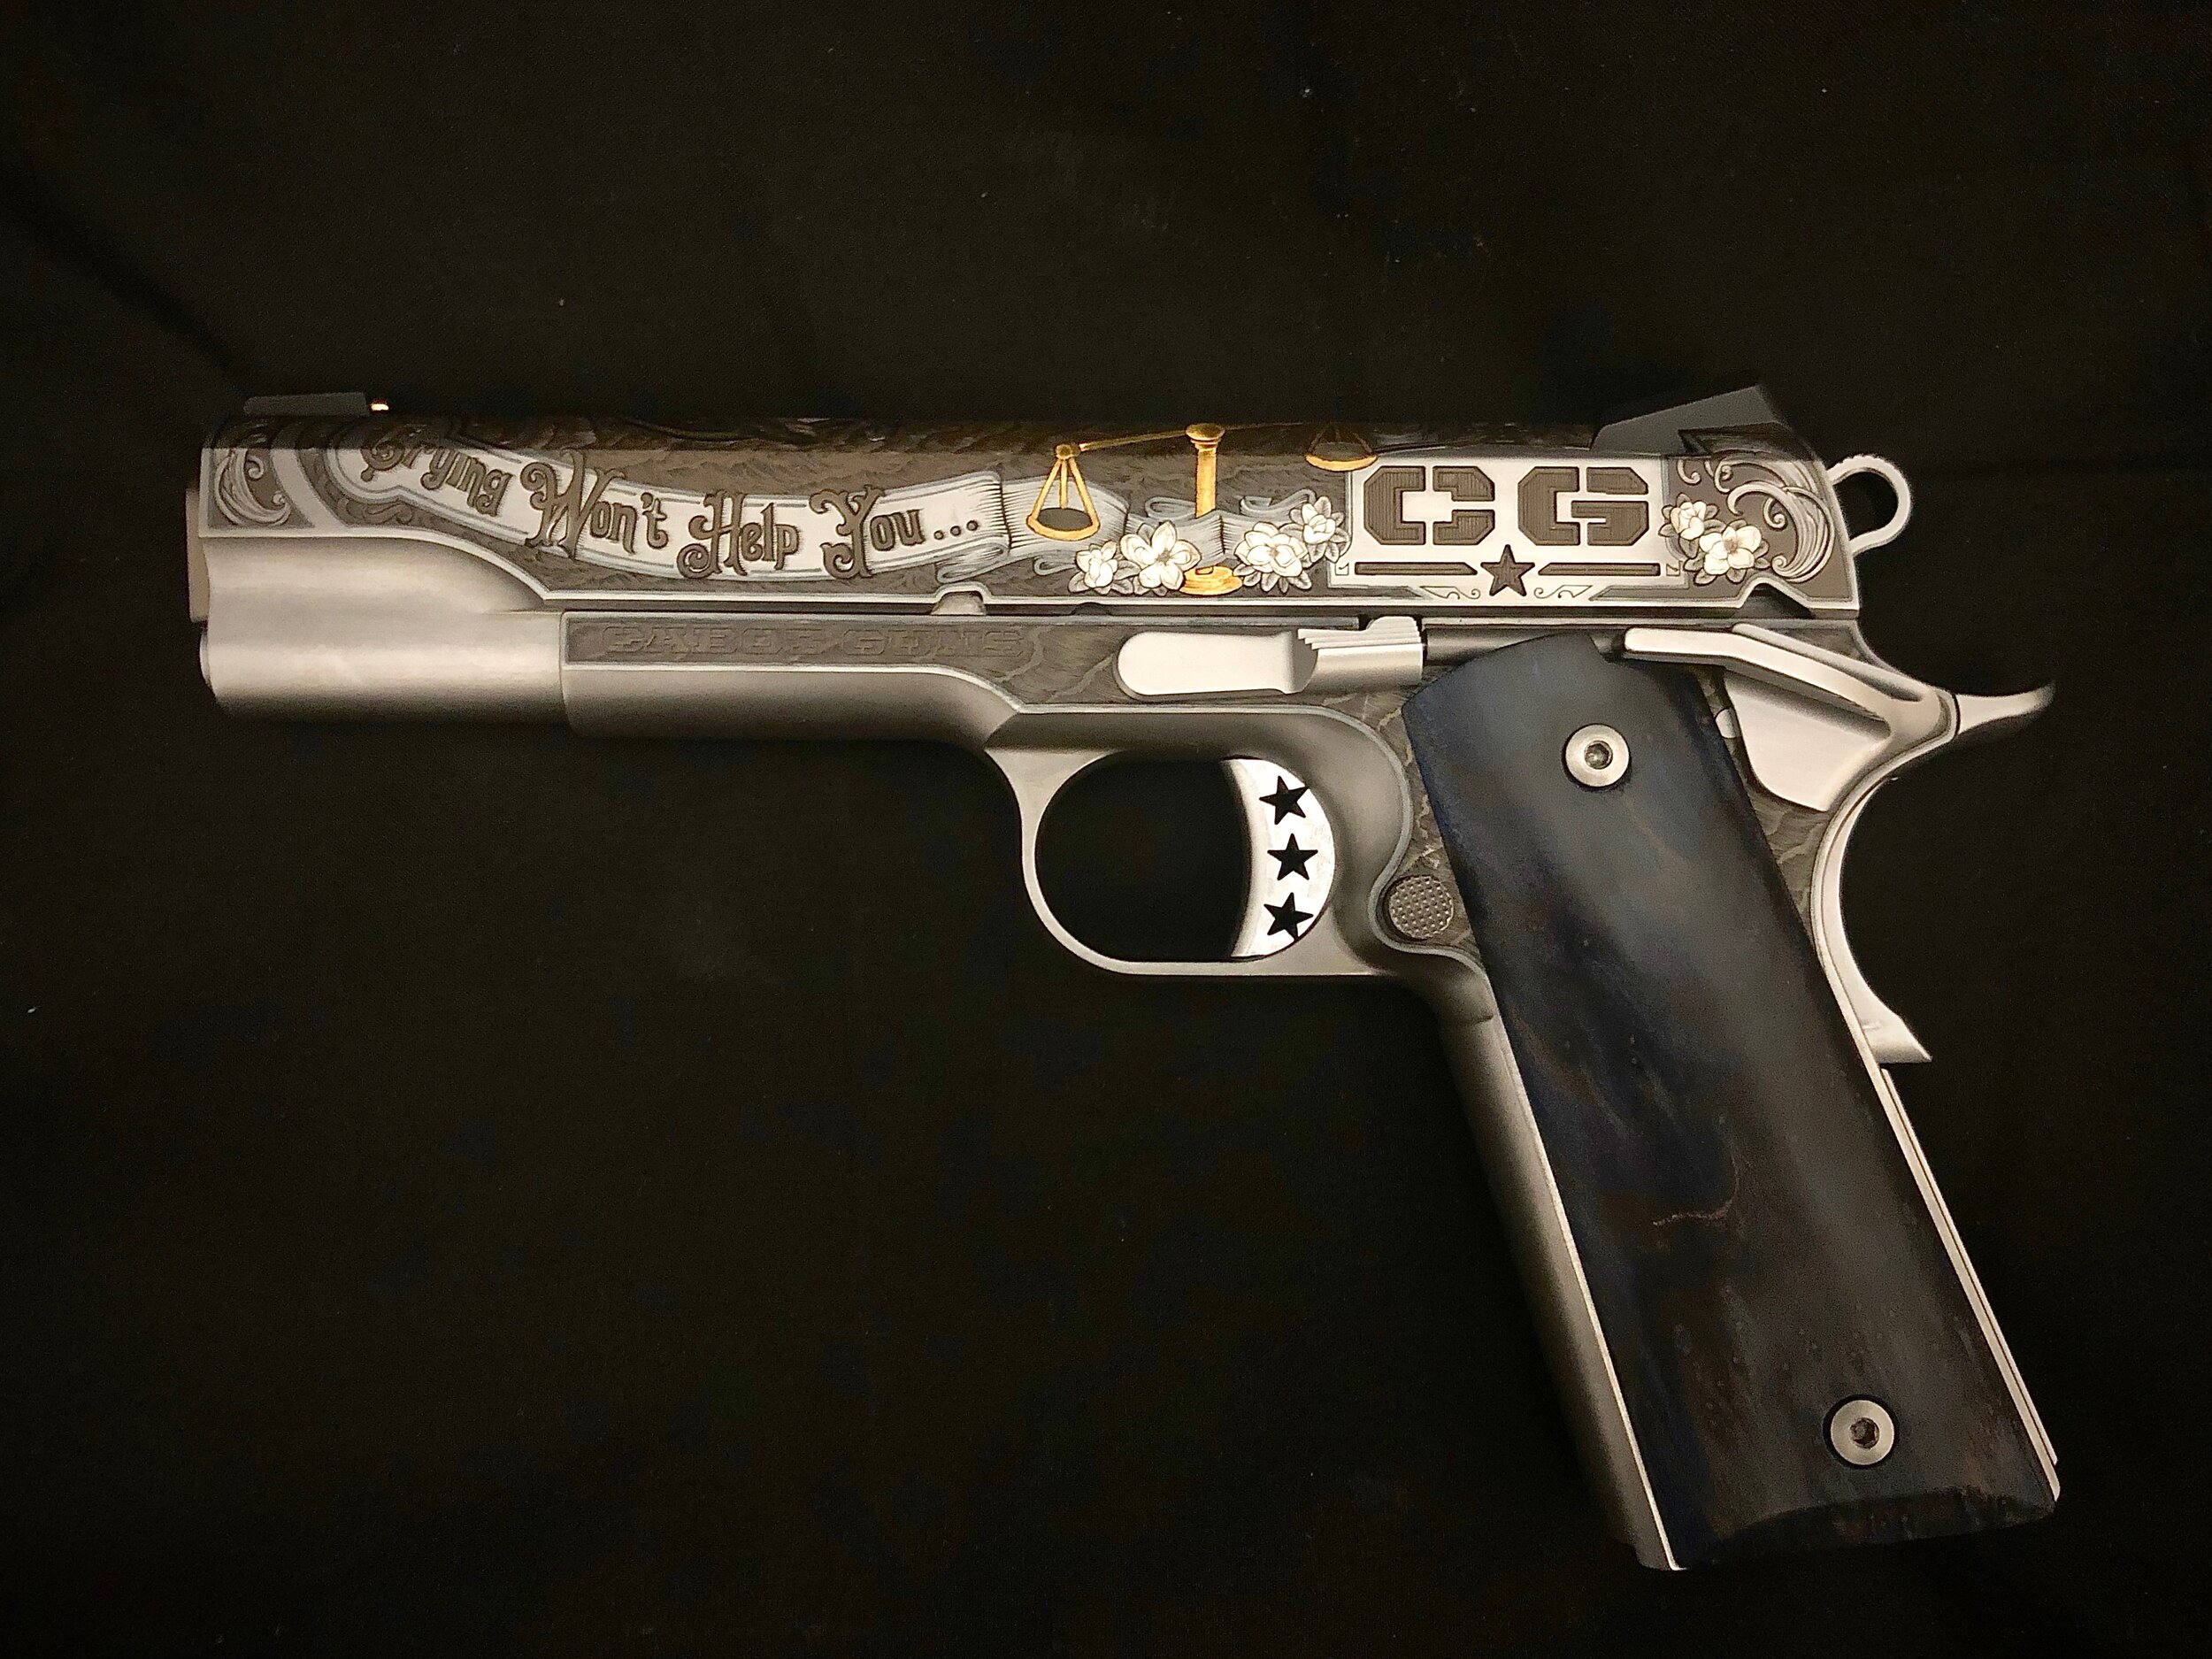
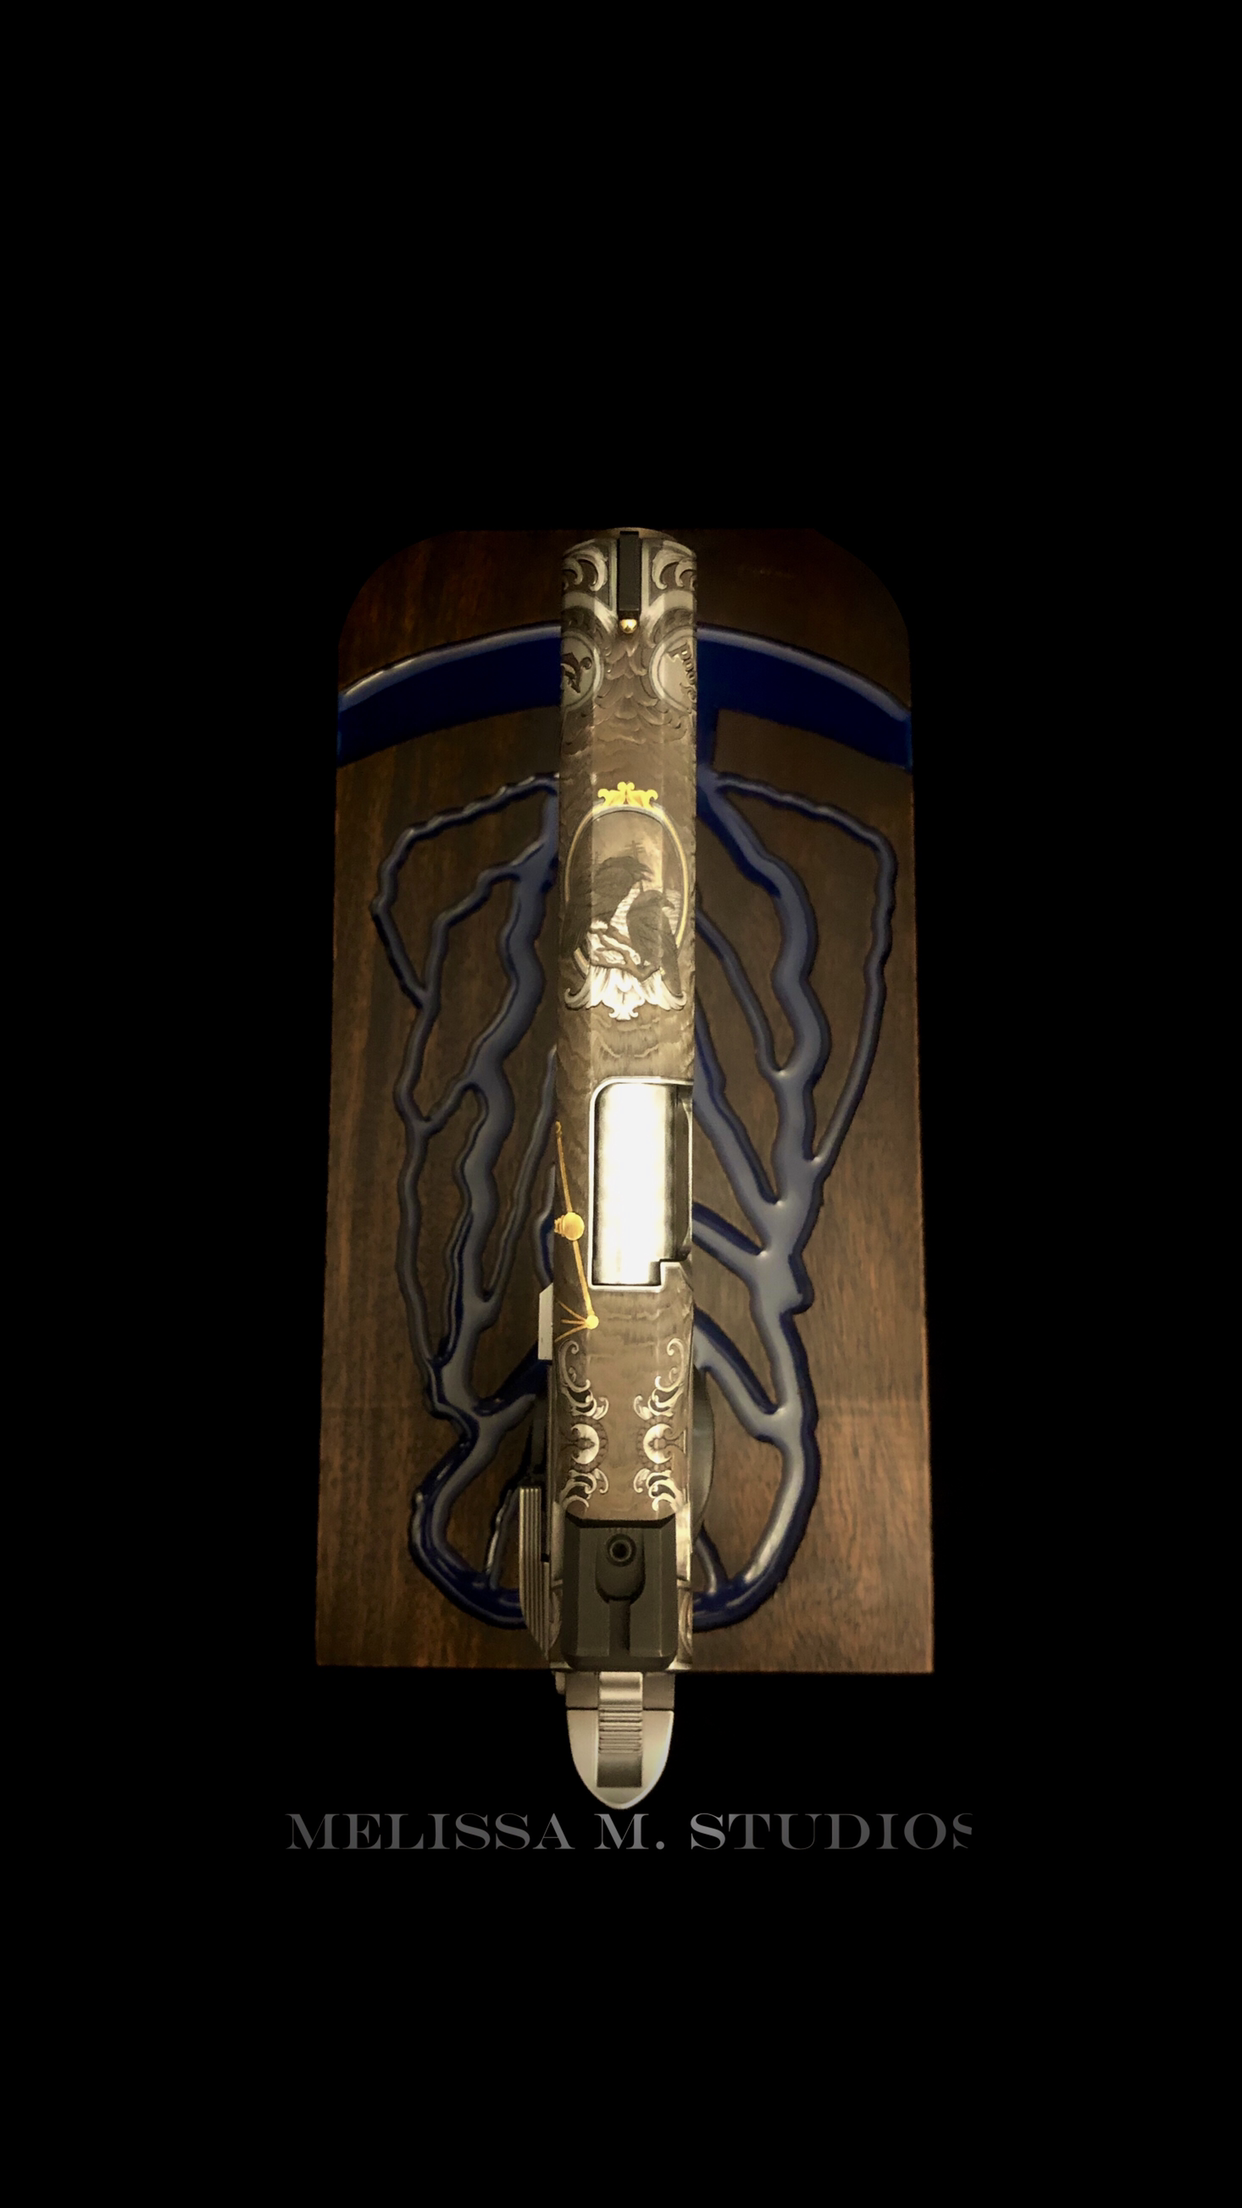
Rock Galotti, the master armorer on the film came up with the idea for the base receiver of a Thompson Center Encore with a bull barrel and gold bead front sight. Many people referring to these as a Thompson Contender, but they are slightly different models and receivers. Steve Parker, of SAP Fine Furniture created the exquisite figured walnut presentation boxes, as well as the trays in which a single round could be served to the duelers. Troy at Bullberry Legacy Barrelworks crafted the bull barrels with the gold bead font sights, and also rough cut the grips and fore ends, from the same museum grade figured walnut the boxes were made of. Rick at Fickle Pelican Woodworks helped to provide the finishing of the grips and fore ends, sanding, polishing and oiling them to perfection. My role was to design and draw all of the artwork and execute the engraving by hand, in deep relief. This included the baroque scroll and skull on the receivers, the custom designed Fleur de Lis grip medallion inserts, barrel engraving, and finally the round casings… all of them! Phew! And being as this was for film, things had to be done in duplicate…. Hats off to the team for pulling this off and getting these exquisite works of craftsmanship off to the set, on schedule, for filming!

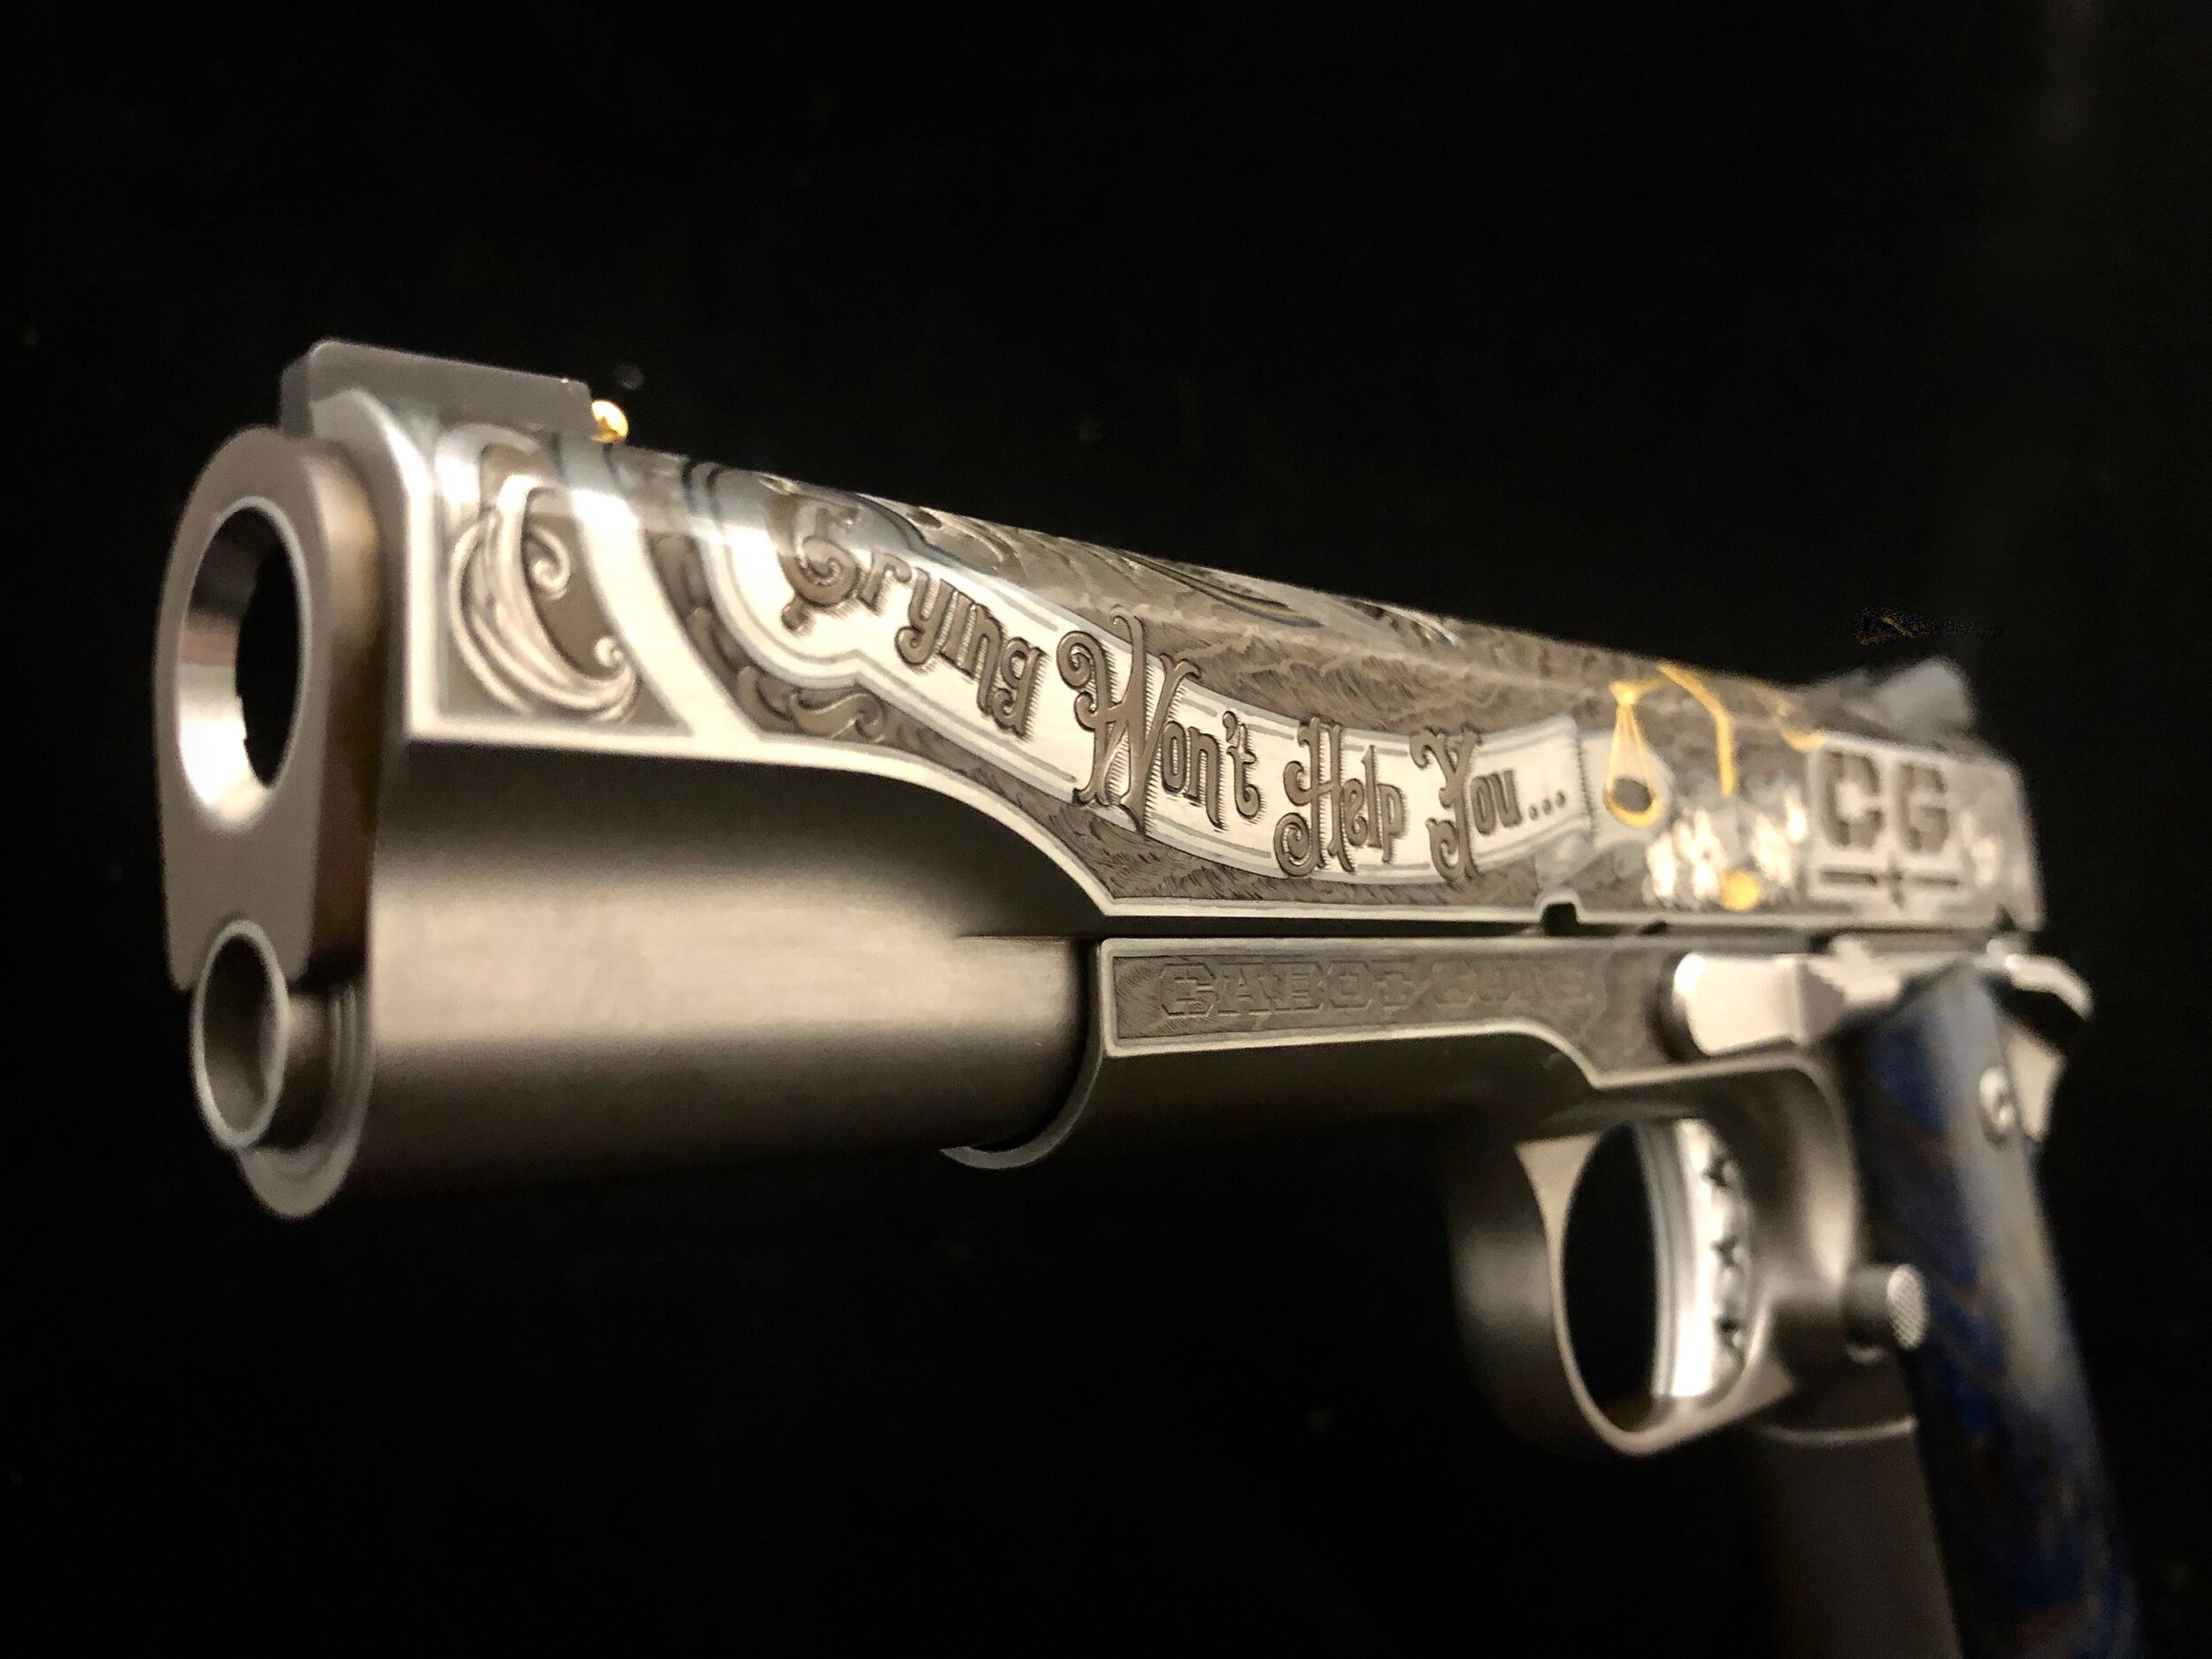
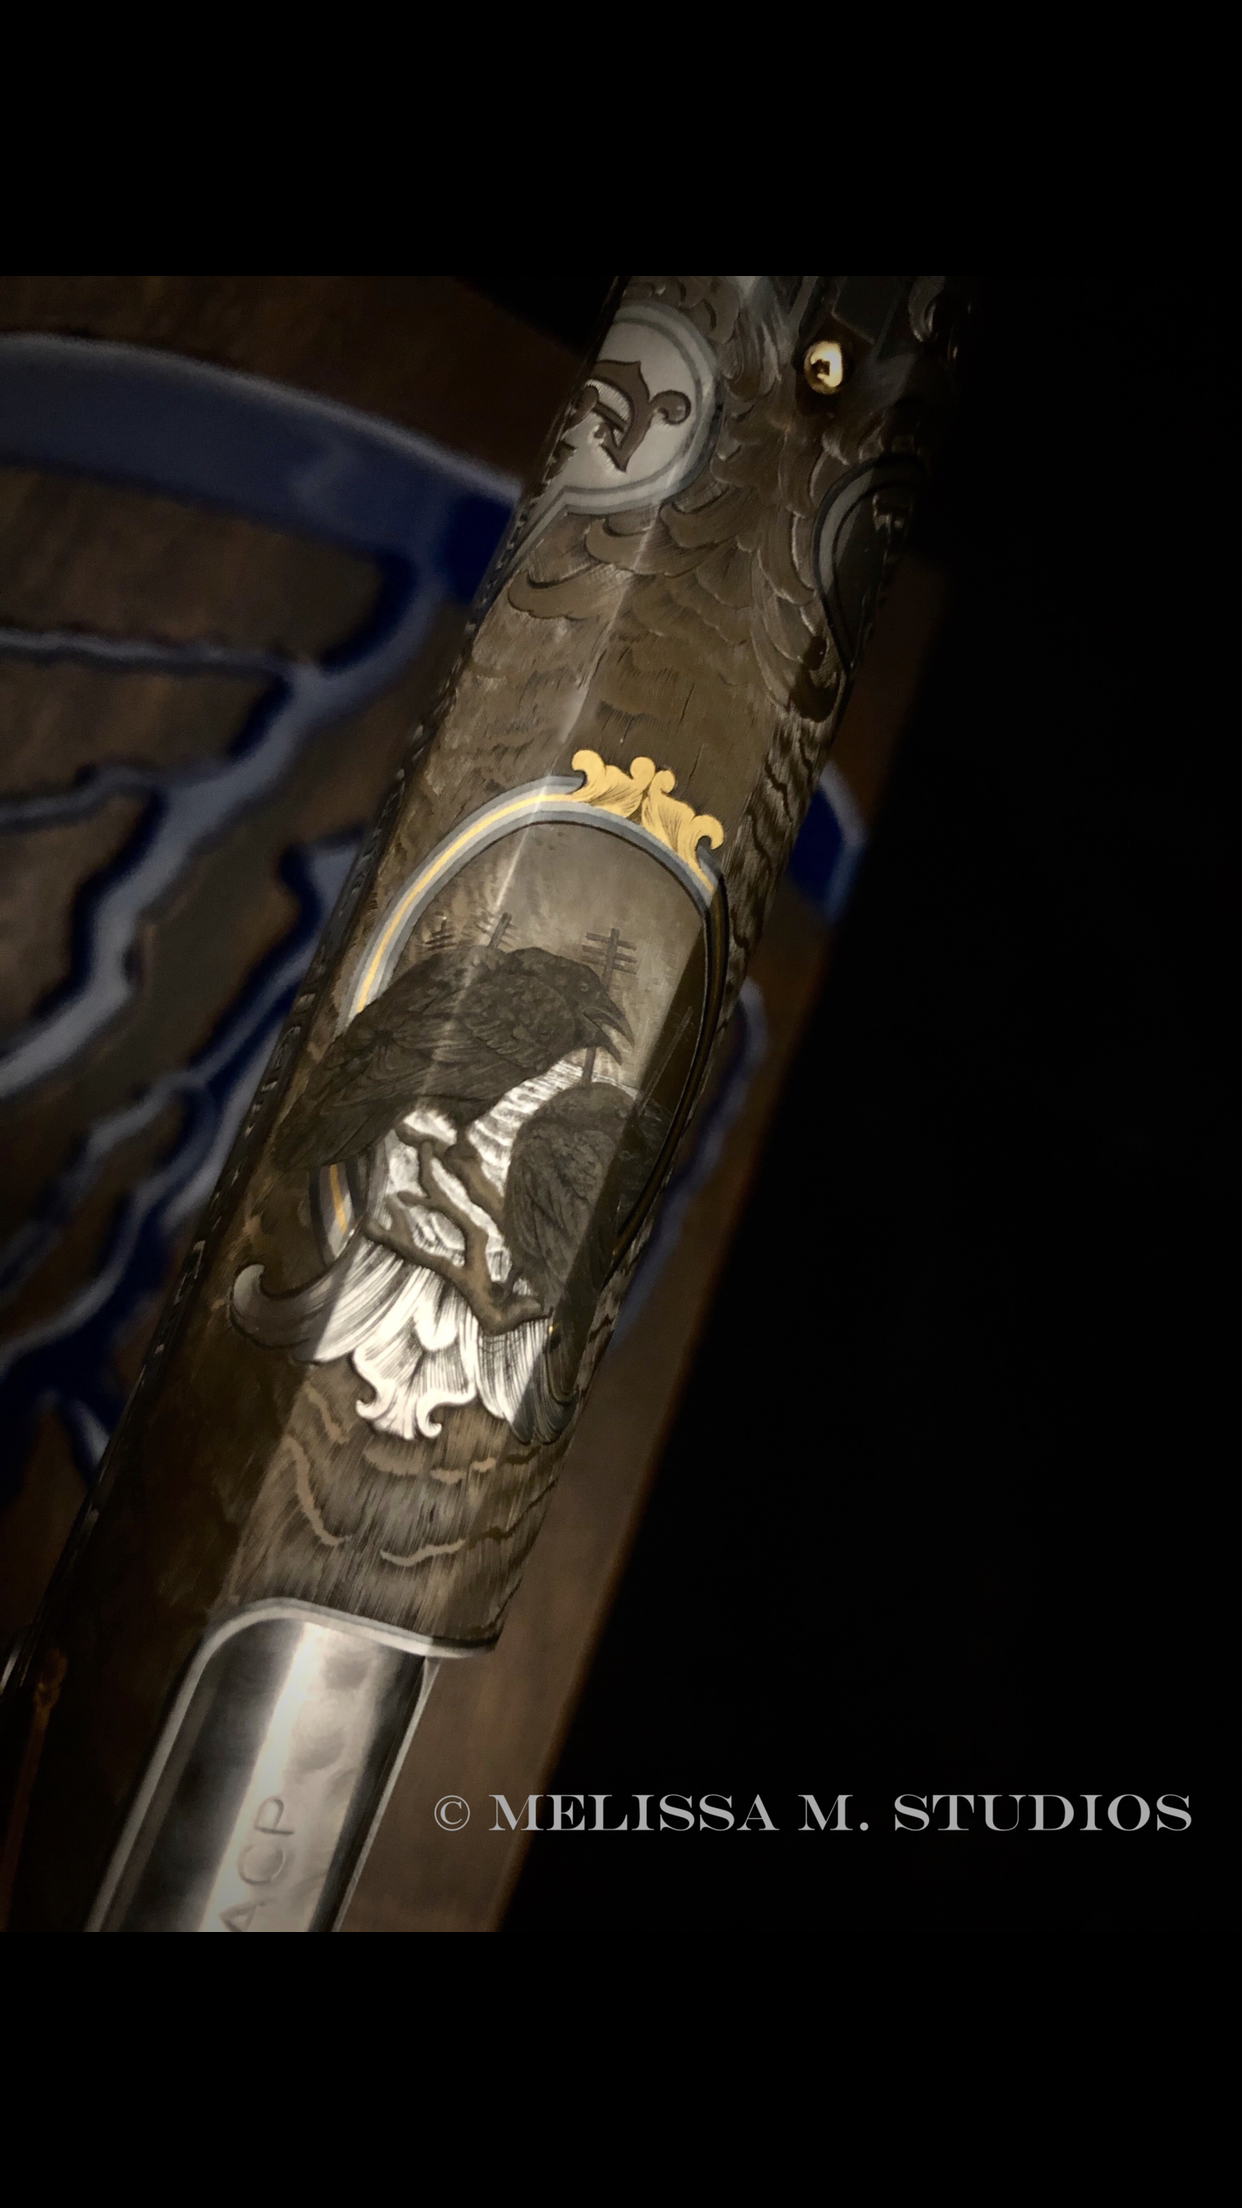
The artwork design was extensive and took well over 100 hours of drawing, brainstorming, changes of direction, and revisions before ultimately settling on a design to execute in steel. In the case of this set, using that art in the two variations to differentiate the pistols slightly but still present them as a matching set. A story old as time, good and evil, ying and yang, which is why one pistol features deep relief engraving inked in black, and the other, a polished background for the skull and scrolling and hammered texture surround.

One thing about the art of hand engraving is, when you see an engravers artwork, it isn’t just the engraving. An engraver is an artist who spends a lot of time drawing, honing their design craft to creating a style of their own, that is then applied to their canvas via engraving and subsequently honing the skills required to cut art into metal. The metal is simply the medium for the original creation in design and drawing. I believe, with any art or craftsmanship, it is important to consider the artists’ process and time in thought and design, as well as the execution and finishing. High craftsmanship, for those that work in these skilled fields is a very time consuming labor of love, but none of us would have it any other way.

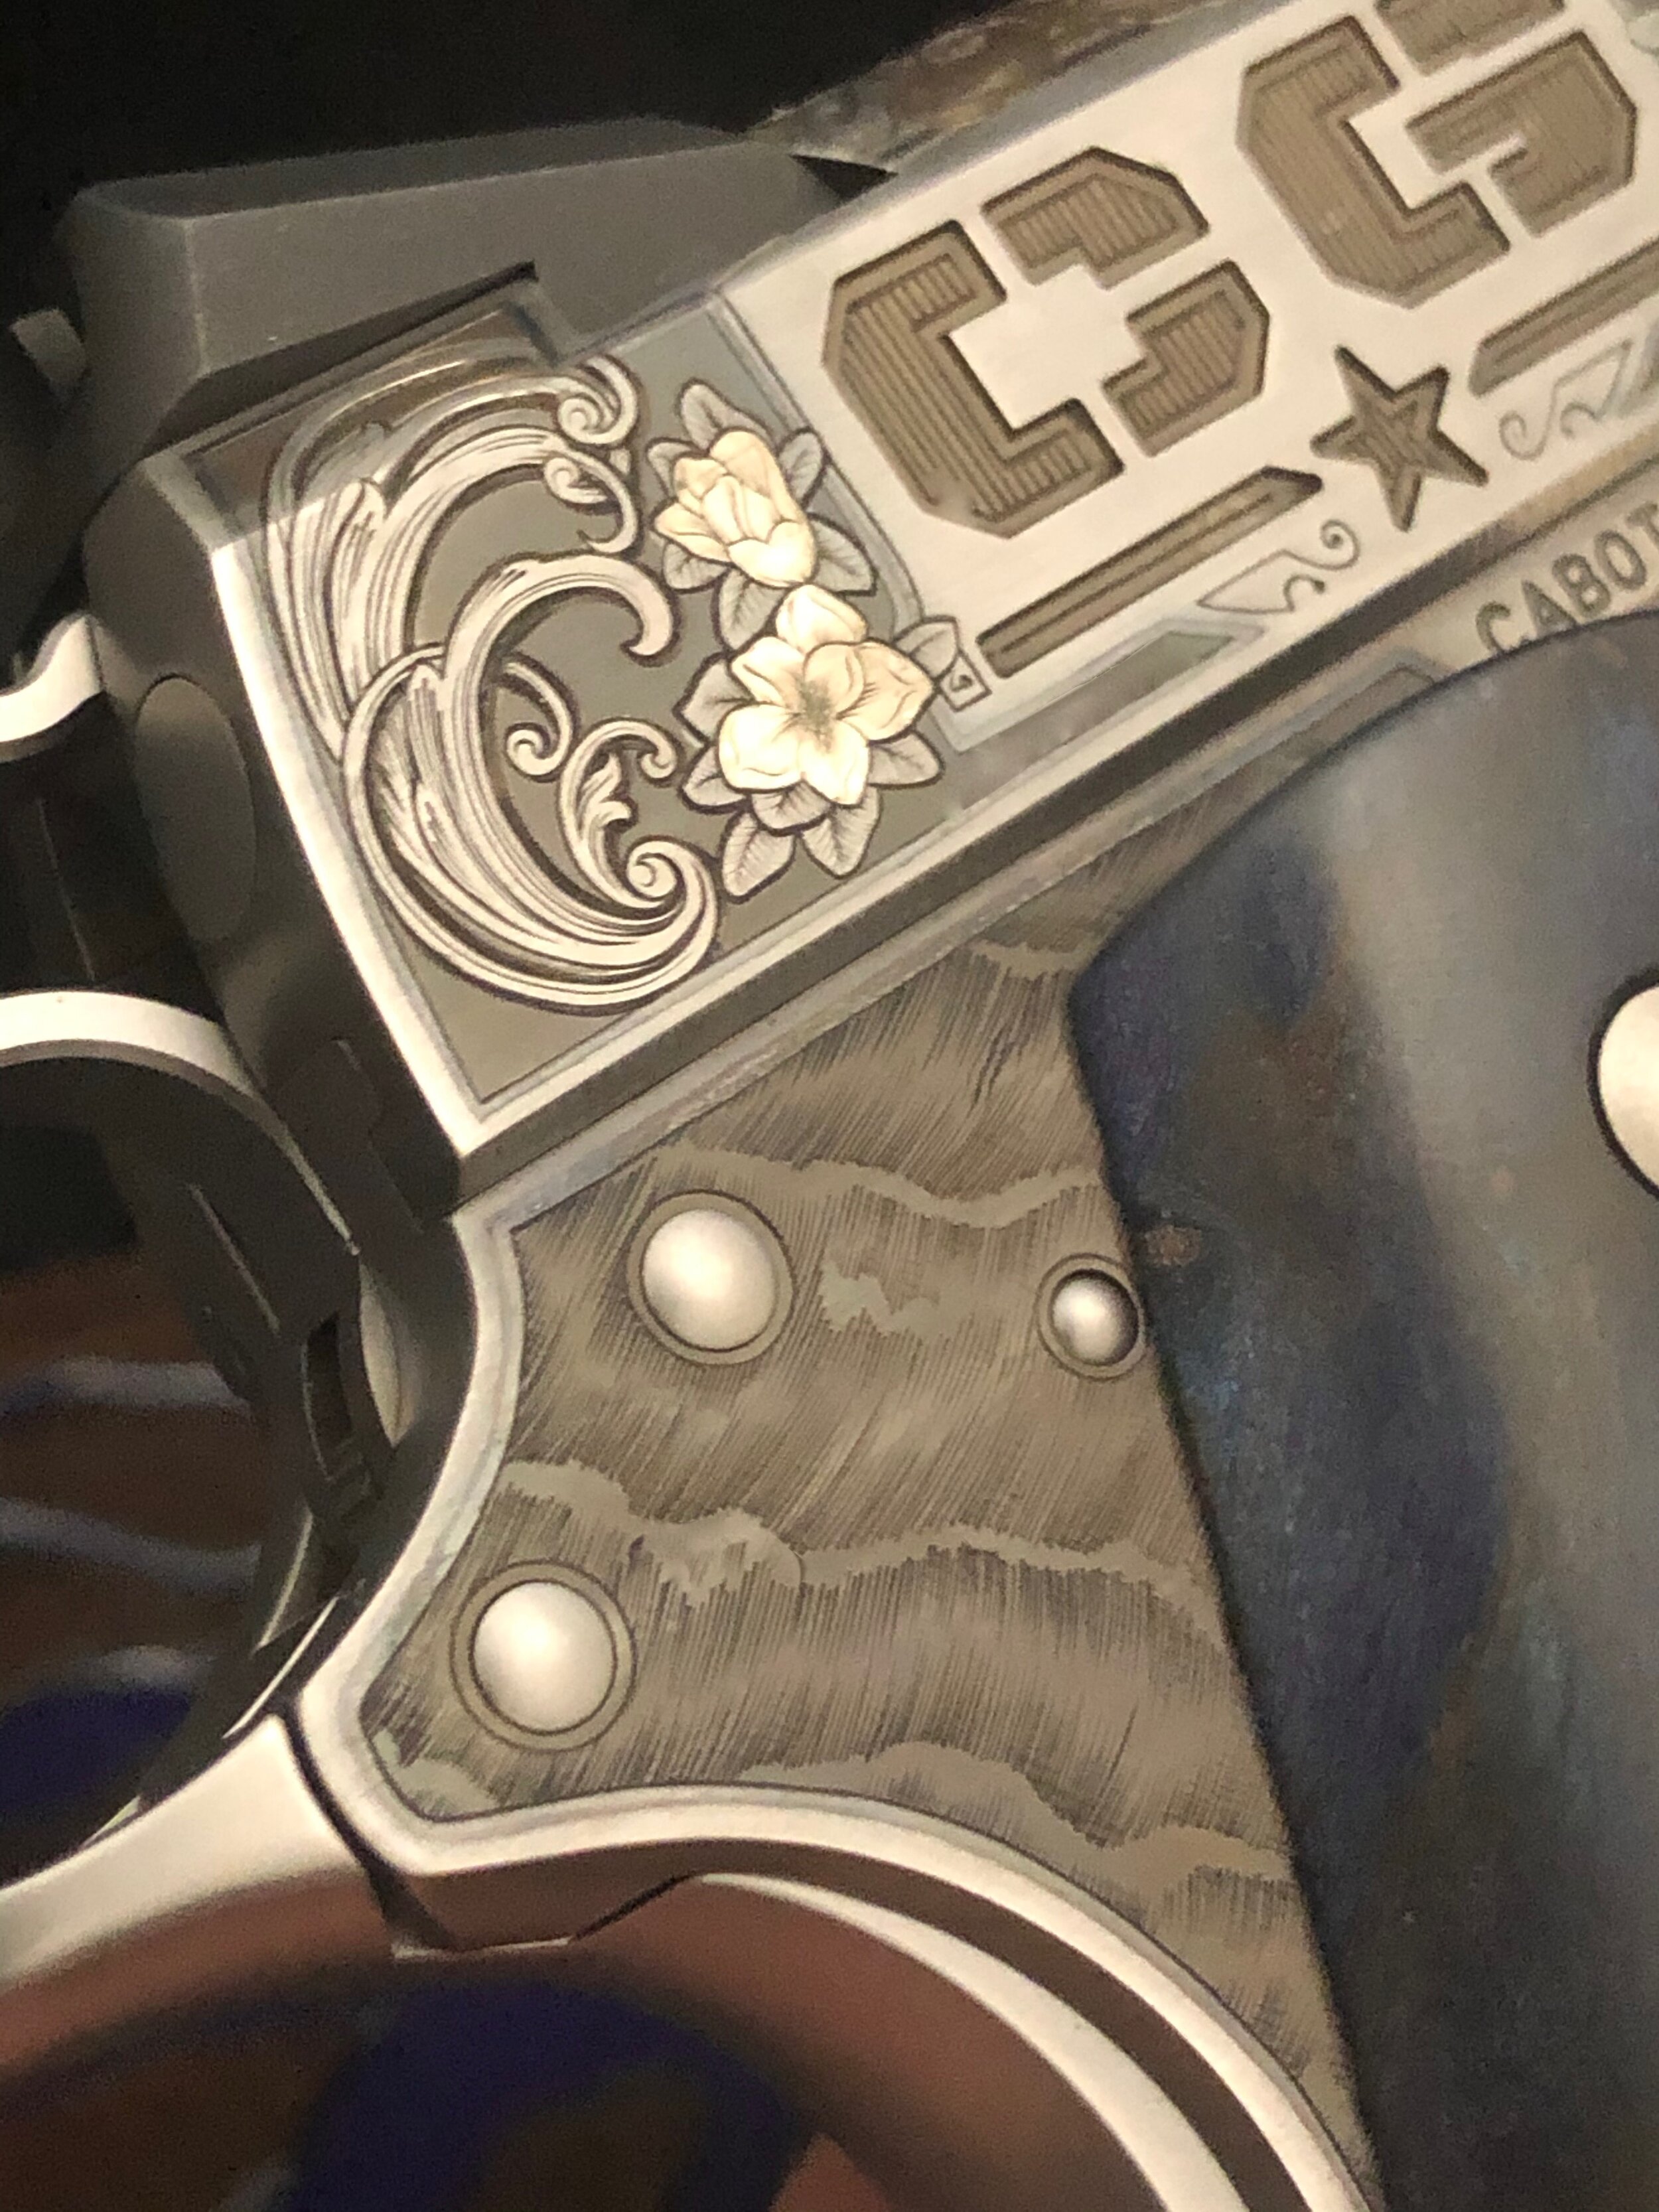
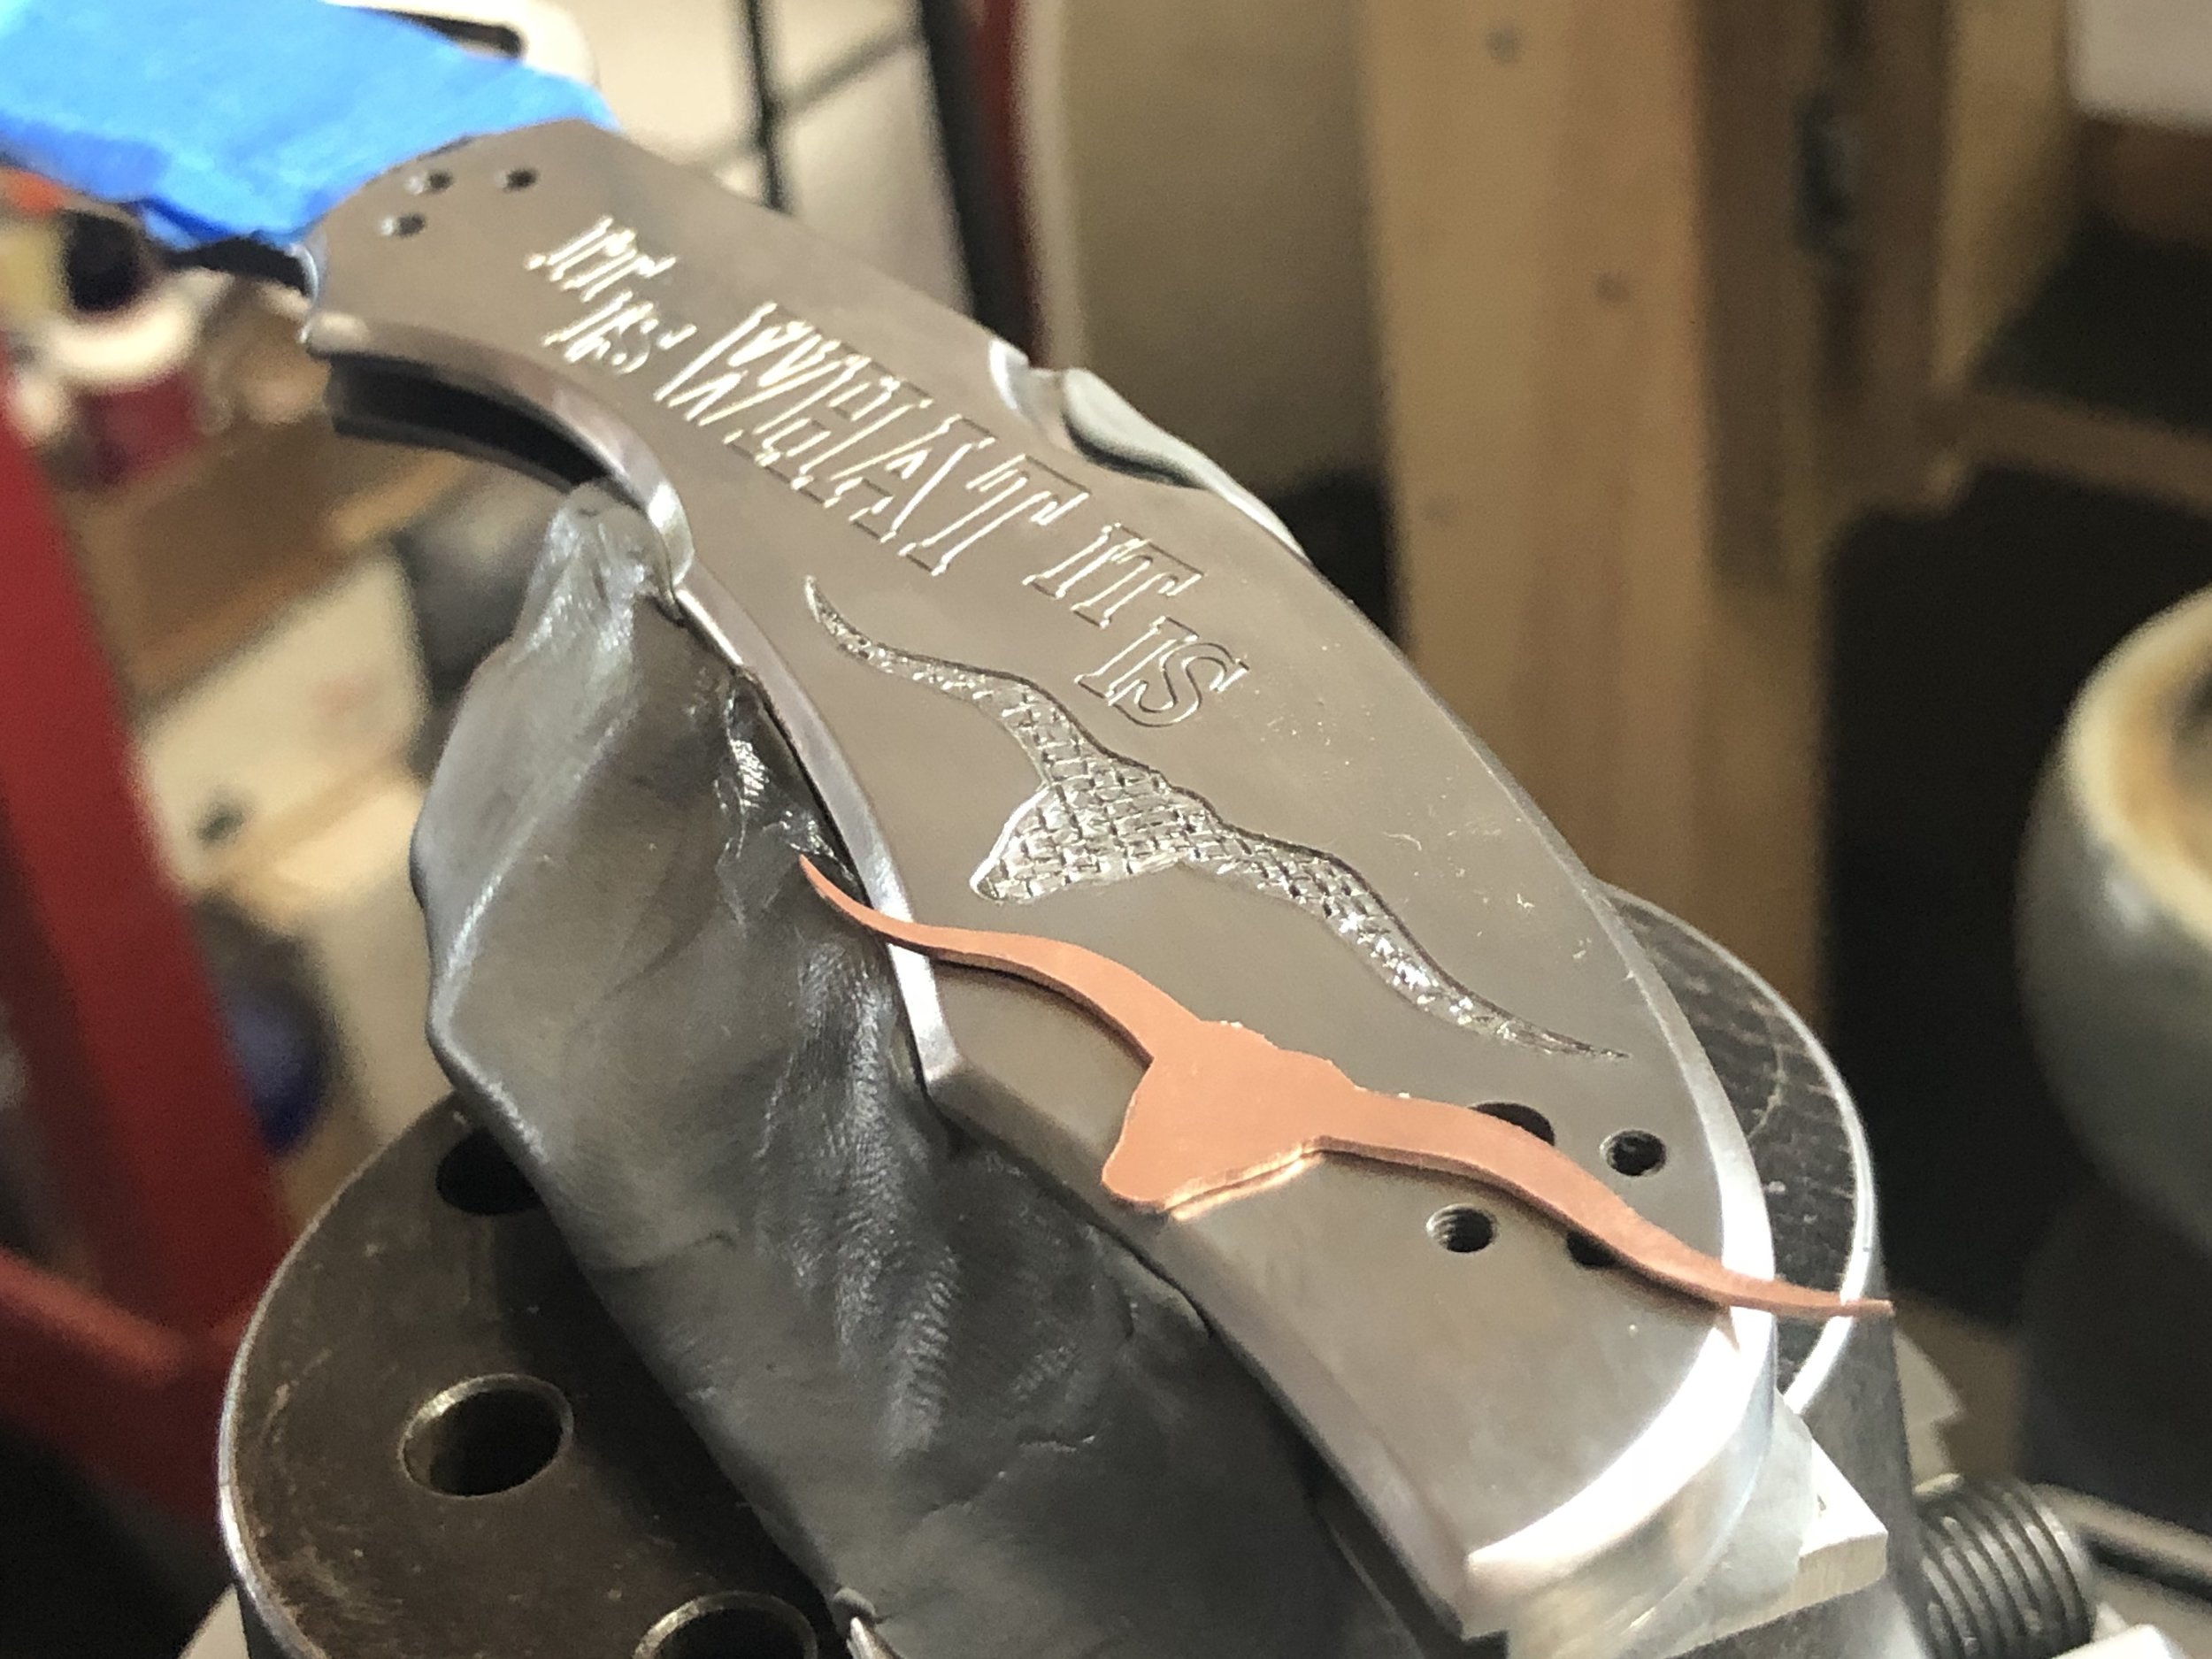
To start the project, each receiver had to be surface prepped for the engraving, which in this case meant taking a bead blasted receiver and finishing it, by hand, to 800 grit on all surfaces. Once the preparation was up to quality standards, I sized my hand drawn artwork to the proper dimensions and printed transfers of the art to apply to the metal. I have several videos on my social media pages, Instagram and Facebook where you can view how the metal is cut. The transfers I use are typically, and were in this case, outlines of the design, as the details I prefer to do freehand and in the moment. Shading a leaf for dimension is, in my opinion, the best part of the engraving itself. It really brings the design to life from being just a simple outline.

My favorite engraving technique is bulino, or sometimes referred to as banknote engraving, but banknote is often confused and is actually a different style if you get into the technical details, but that is a different topic all together! The fine detail in the skull is done very slowly and painstakingly using a combination of cut lines and dots to bring it to a photorealistic appearance. Some of this work was done using a pneumatic hand piece and some of it is done by hand pushing a burin into the metal. Different geometries of your cutting tool, the depth of the lines or dots, the exact shape of the dot, and the size or pressure applied when cutting, all help create the range of grey scale in the image.

Once the engraving was completed to my satisfaction, it was onto inking the images to create more contrast and then to reassembly. At this point, I thought I was done and the project was coming to a finish, but then came Rock’s idea for engraving the round casings…. and lots of them, because again, when it’s for film, they have to be in duplicate. But hey, engraved bullet casings in a very cool presentation case, I’m in! Each of those has my single line work simple scrolling and a silhouette of the specific fleur de lis detail I designed for the grip medallions. The grip medallions were also my original artwork variations of a traditional fleur de lis, but with a baroque scroll detailing to match the scrollwork designed for the receivers.

The feeling of having everything reassembled, in the presentation boxes and ready to go on the big screen was incredible for the whole team. Giddy is the only word I can thing of to describe that first pull of the trigger guard to break the barrel open! Giddi-er (if thats a word?) came seeing the movie and Keanu Reeves, as John Wick, do the exact same thing when handed his pistol for the epic duel scene.

I’m honored and proud to be able to represent my craft in such a way. I hope you get out and enjoy the film and have enjoyed hearing about the process of creating these pieces of art and cinematic history. If you’re a fan of the artwork itself, you’ll find a series of limited edition hand printed Intaglios of this set, available for purchase in my website shop.


Best regards,


M.

When the Levee Breaks...


IMG_3795.jpeg

This engraved Cabot S100 (1911) is inspired by the classic song “When the Levee Breaks,” penned by Memphis Minnie and Kansas City Joe McCoy after the Great Mississippi Flood of 1927, later popularized by Led Zeppelin and other artists’ renditions. The lyrics of the song reflect the trials of that time, the many deaths and massive displacement of residents of the Mississippi Delta.  The unstoppable force of the rain, mother nature, combined with bureaucratic injustices, left the people affected feeling exactly what the lyrics convey, “Crying Won’t Help You and Praying Won’t Do No Good”, the flood is coming and the levee will break.  


The emotional charge of the song and underlying context of the situation provided the inspiration to design a engraving based around the event and lyrics.  It is actually the theme that first inspired me to learn the art of engraving as I wanted to create an art piece in steel from this inspiration.   The presentation of a deadly threat, combined with the right to bear arms, to defend oneself, puts one in a similar predicament, in which, the threat has presented itself, and Crying Won’t Help, and Praying Won’t Do No Good.  One’s only unfortunate option is to meet the threat head on.  At first glance one might mis-interpret the saying as being projected outward, offensively, but it is indeed the other way around, a defensive sentiment. Which is why the empty balance is tipped and the flood waters are rushing rearward towards the defendee, that has been placed in a situation, where their 2nd amendment right may be called upon to save their life.  


This is an art piece, intended as most art is, to spur thought and interpretation but it is specifically for anyone, soldiers, police, and citizens, who has ever or will ever be faced with that grave situation, where only action and defensive methods will help them.  The highly detailed bulino engraved ravens, long known as an ominous symbol of desperation and dark omens, sit on top of the slide in the blued iron and gold outlined cartouche, filled with a flooded street, downed power lines and trees in the aftermath of the flood event.  As Louisiana was the state most greatly affected by the 1927 flood, the state flower, magnolias, are inlaid in fine silver and  scattered throughout the design to represent hope, life and regrowth.


IMG_3812.jpeg

The idea for this engraving came about well over a decade ago, but the right opportunity came with this 1911 canvas, and the developement of skill and the learned techniques of difficult material inlay (Iron) and knowledge of selective finish removal.  The deep lustrous finish of Charcoal Blueing has long been my favorite finish, but with a stainless gun, the finish would be bronze via that method, which just happened to be perfect for conveying muddy flood waters. The only way to achieve the charcoal blue accents is to blue carbon steel or iron into the stainless. Alas, the difficult task of ornamental iron inlay was the only option and so the process began.  Combined with careful design aspects, strategically placed barrier cuts and other inlays of gold and silver ornament, the design came together.  The entire gun was inlaid and hand engraved, then sent to Turnbull Restorations for finishing.  Once back in my shop, the entire gun was bronze, with the iron inlays being blued.  The delicate process of selective removal of the bronzing began. In areas intended to show the raw stainless finish, the bronzing had to be removed, which was done under the microscope using sharpened bamboo and various molarities of two different acid formulas.   One wrong move, or too much acid on the bamboo, and the whole process has to start again.  Luckily, patience, slow control movements, skill and a bit of luck prevailed. 


I worked on this piece solid for nearly three months in order to submit it, alongside 2 other pistols, for my Master Engraver certification from the Firearms Engravers Guild of America.   The hard work and years of study paid off and it earned me my Masters title, along with receiving the 2020 award for Best Engraved Handgun.  


Thank you for taking the time to read about this piece and the interest in my work.  I hope you have enjoyed the art and techniques along with the story behind them.  

5E373D3E-9CE8-4A3C-8121-7EA3B16542F1.JPG


·      Cabot Guns S100  .45ACP

·      Designed and Engraved By Melissa McMinn Studios

·      Iron, 24k Gold and Fine Silver Inlays, Multi-finish bulino scene

·      Charcoal Blue and Carbona Bronze finish by Turnbull Restorations - freehand selective removal via acid by Melissa McMinn 

·      Custom Spacecake Redwood Burl Grips, dyed and stabilized -Shaped and Polished by Fickle Pelican Woodworks

Hand Engraving and Hammered Copper Inlays

Most techniques and things I do that even border on a "signature style" have resulted as a once experimental notion during a family or friends project, or from spare time in the shop spent tinkering around with left over materials.  The hammered copper inlays I've been doing as of late are no exception to this.  Not to say it hasn't been done before, I'm sure it has, but I hadn't ever seen it, and thought it could be cool.   And I just happened to have a sheet of copper, as well as some copper wire to play with, so why not!

The first one I created was the Arta River trips knife.  This was a more personal project for a dear friend of my husband, so I had that extra creative freedom that comes with the "family discount" 😂.   The large ARTA letters, I did in copper sheet, and the smaller River Trip letters were done with wire.  The only problem was, the copper sheet I had on hand was far too thick for sheet inlay.   So...what to you do when you live in the woods in the middle of nowhere and don't have the correct thickness material or a rolling mill?   Go viking on it!  Hammers, a hydraulic press in the equipment yard, some plates of steel to squish it between, an anvil, and a torch,...because, any reason to use a torch is a good reason.  After a couple hours of bashing around on the copper, courtesy of my husband, the copper was acceptable, and might I add exceptionally consistent in thickness despite our crude techniques.  

Once I got the cavities excavated and the teeth created, the inlay went swimmingly after a bit of mods to the "teeth" to make them a bit heartier than they usually are for my finer work.  The small letters with wire were a beast at best, and a lesson that I'll be sticking to larger spaces if possible and sheet for this technique when using copper as the inlay material.  I also made several different tools for the pneumatic handpiece to create the hammered look, but after doing about 3-4 knives using this technique, I've decided there's no substitute for an actual hammer on the copper, plus it's much more tactilely pleasing to create the texture that way.  One must be very careful not to ping and damage the surrounding steel though.  

After the second and third knives I did in this style I have the technique down pat and it's at an enjoyable pace.  I really love this look and the process of creating it.  A little hammer and chisel work, a dash of jewelers saw, some fine detailing and viola!   This style looks great for ranch brands, as there's something undeniable about the culture of the great American "west" and ranching in general that copper tones, and rustic textures seem to compliment.  

If you're reading this blog and are interested in commissioning a hammered copper design for yourself or a loved one, please reference COPPERBLOG in the checkout process for free shipping. You can visit my Shop section, to purchase a Byrd knife with a brand or logo, or work with me on your specifics and I'll set up a  custom order link for you after chatting about your project.  You can contact me at melissa@melissamstudios.com with any questions or ideas.  Since the year is flying by and we're in to August already I like to remind my clients that due to the time consuming nature of hand work, my Holiday orders schedule typically causes me to close my books to holiday orders by mid-late October, so get your requests in sooner than later!  Last year, I had to stop taking additional orders in September in order to ship all projects by their deadlines.  There is always the option of gift certificates as well, which I honor for any items I list in my shop, or towards custom orders as well.

Thanks for reading and for your interest in my work!